logo depicting chicken on motorcycle handlebars in black and white

Hogs and Hens Urban Farm

Tag: garden

  • Embracing Slow Changes for Lasting Growth

    Embracing Slow Changes for Lasting Growth

    image of a curly willow and a sidewalk garden shows mostly hostas and marigolds sparsely planted
    We worked hard to build this area into a willow guild but didn’t realize it was destroying our sewer lines. The lines were not observed when it was planted before we bought the house.

    There’s this moment most of us have had.

    You get inspired.
    You see the vision.
    You’re ready to change everything—your garden, your soil, your habits, your food, your life.

    And then… a few weeks later, you’re overwhelmed, behind, and wondering why something that felt so exciting suddenly feels so heavy.

    I’ve been there too.

    And what I’ve learned—both in the garden and in life—is this:

    Fast change burns you out.
    Slow change builds something that lasts.


    Nature Doesn’t Rush—And That’s Not an Accident

    If you’ve ever watched a piece of compacted clay soil slowly turn into rich, living earth, you already understand this.

    It doesn’t happen overnight.

    You don’t throw compost on it once and suddenly have perfect soil. Though it would be really nice to dream about.
    You layer. You observe. You adjust. You wait.
    Then you do it again with consistency.

    That’s how ecosystems are built.

    And here’s the truth most people skip over:

    Permaculture isn’t about doing more. It’s about doing the right next thing, consistently.

    In fact, using slow gradual changes is actually one of the principles of permaculture!

    Not everything at once.
    Not perfectly.
    Just… intentionally.


    Why Slow Changes Actually Work (When Fast Ones Don’t)

    Let’s be real—fast change feels productive.

    But slow change is what actually sticks.

    Here’s why:

    1. Your System Has Time to Respond

    First in ground garden at Hogs and Hens Urban Farm transitioning from yard to garden
    Our first year planting in ground was a year for learning. We didn’t add enough soil, compost or mulch. We didn’t use enough cardboard, but we observed each challenge and slowly made changes to create a better garden!

    Whether it’s your soil, your garden layout, or your daily routine—everything is a system.

    When you make one small change, you can actually see what it does.

    • Add compost → watch moisture retention improve
    • Introduce mulch → observe weed pressure drop
    • Shift planting timing → notice growth differences

    If you change ten things at once, you don’t know what worked.

    And if you don’t know what worked, you can’t repeat success.

    Updated image of our 2026 Garden. Hearty perennial onions grow in rich rows that are heavily mulched
    5 years later, the soil is rich, deeply composted, and fertile

    2. You Reduce Overwhelm (and Actually Follow Through)

    Let’s talk honestly for a second…

    Most people don’t fail because they’re lazy.
    They fail because they tried to do too much, too fast.

    Slow change gives your brain space to keep up.

    Instead of:

    • “I need to build raised beds, start compost, plant everything, fix my soil, and install irrigation…”

    You shift to:

    • “Today, I’m starting a compost pile.”

    That’s doable.
    That’s sustainable.
    That builds momentum.


    3. You Build Resilience Instead of Dependency

    Quick fixes often rely on outside inputs. We live our life trying to consume less and keep our systems as closed loop as possible.

    Slow systems build strength from within. Having a closed loop system means less trips to town, less fuel used, less waste generated (packaging) and lets be honest, it feels really good to know where your food comes from!

    • Compost instead of synthetic fertilizer
    • Mulch instead of constant watering (chipdrop.com is a way to get free mulch!)
    • Diversity instead of monoculture because diversity creates strength

    You’re not just fixing a problem—you’re building a system that prevents the problem next time.


    The Real Magic: Learning How to Pivot

    Here’s where slow change becomes powerful.

    Because when you move slowly…

    You can adjust.

    And that’s everything.

    Gardening (and honestly, life) isn’t about getting it perfect the first time.
    It’s about reading what’s happening and responding. I once planted the most beautiful crop of watermelons too close to a fence. I had not accounted for the shade the fence would be casting on the melons, and because of that, they didn’t get the sunlight they needed to thrive. If I had taken the time to actually map the sun across my yard, I would have seen the issue, but I was so excited to have such strong seedlings, I absolutely skipped the observation phase initially.


    Practical Ways to Pivot as You Go

    Let’s make this real and usable.

    🌿 Observe First, React Second

    Before you “fix” anything, ask:

    • What is the soil telling me? Are the weeds telling you what your soil needs?
    • Where does water naturally sit or run? Seriously look outside when it is raining. Watch where the water moves, and figure out where it absorbs, where it pools, and where it simply runs away.
    • Which plants are thriving without help? These are rockstars and will help you plan good companions for these anchor plants.

    Observation saves you time, money, and energy. In the case of my first attempt at Sugar Baby watermelons, it would have saved me some heartbreak at the realization they wouldn’t be able to get enough sun to fully ripen,


    🌱 Make One Change at a Time

    This is your golden rule.

    Instead of overhauling everything:

    • Add compost to one bed
    • Trial a new mulch in one area
    • Test a companion plant pairing in a small section

    Then watch.

    Let the garden give you feedback. You don’t want to spread an entire load of aged manure on your whole garden, only to realize it has residual herbicides that remained. I’ve seen it happen, and it is heartbreaking.

    Nature doesn’t create an ecosystem overnight.


    🌼 Use “Test Zones” in Your Garden

    You don’t need perfection—you need information.

    Create little experiment areas:

    • One section with heavy mulch
    • One with light mulch
    • One with different mulch

    See what performs best in your space.

    That’s better than any generic advice online. I see many gardeners using straw in their garden, but we have had nothing but bad luck when we have used it. I’m not saying straw is bad as a mulch source, I’m saying that it is not a good choice for THIS homestead. I learned that by observation.


    🍂 Adjust Based on Results, Not Expectations

    This one can be humbling.

    Sometimes what should work… doesn’t.

    And that’s okay.

    If something isn’t thriving:

    • Move it
    • Amend differently – It has taken me 2 years to get my peach trees looking healthy after a peach leaf curl fungus infected our trees.
    • Replace it with something better suited

    Pivoting isn’t failure.
    It’s how you refine your system.


    🌻 Stack Small Wins

    Instead of chasing big transformations, look for small improvements:

    • Soil holds moisture better than last month
    • Fewer weeds than last season
    • One crop that did really well

    These are signals you’re on the right path.

    And over time?

    Those small wins compound into something incredible.


    What This Looks Like in Real Life

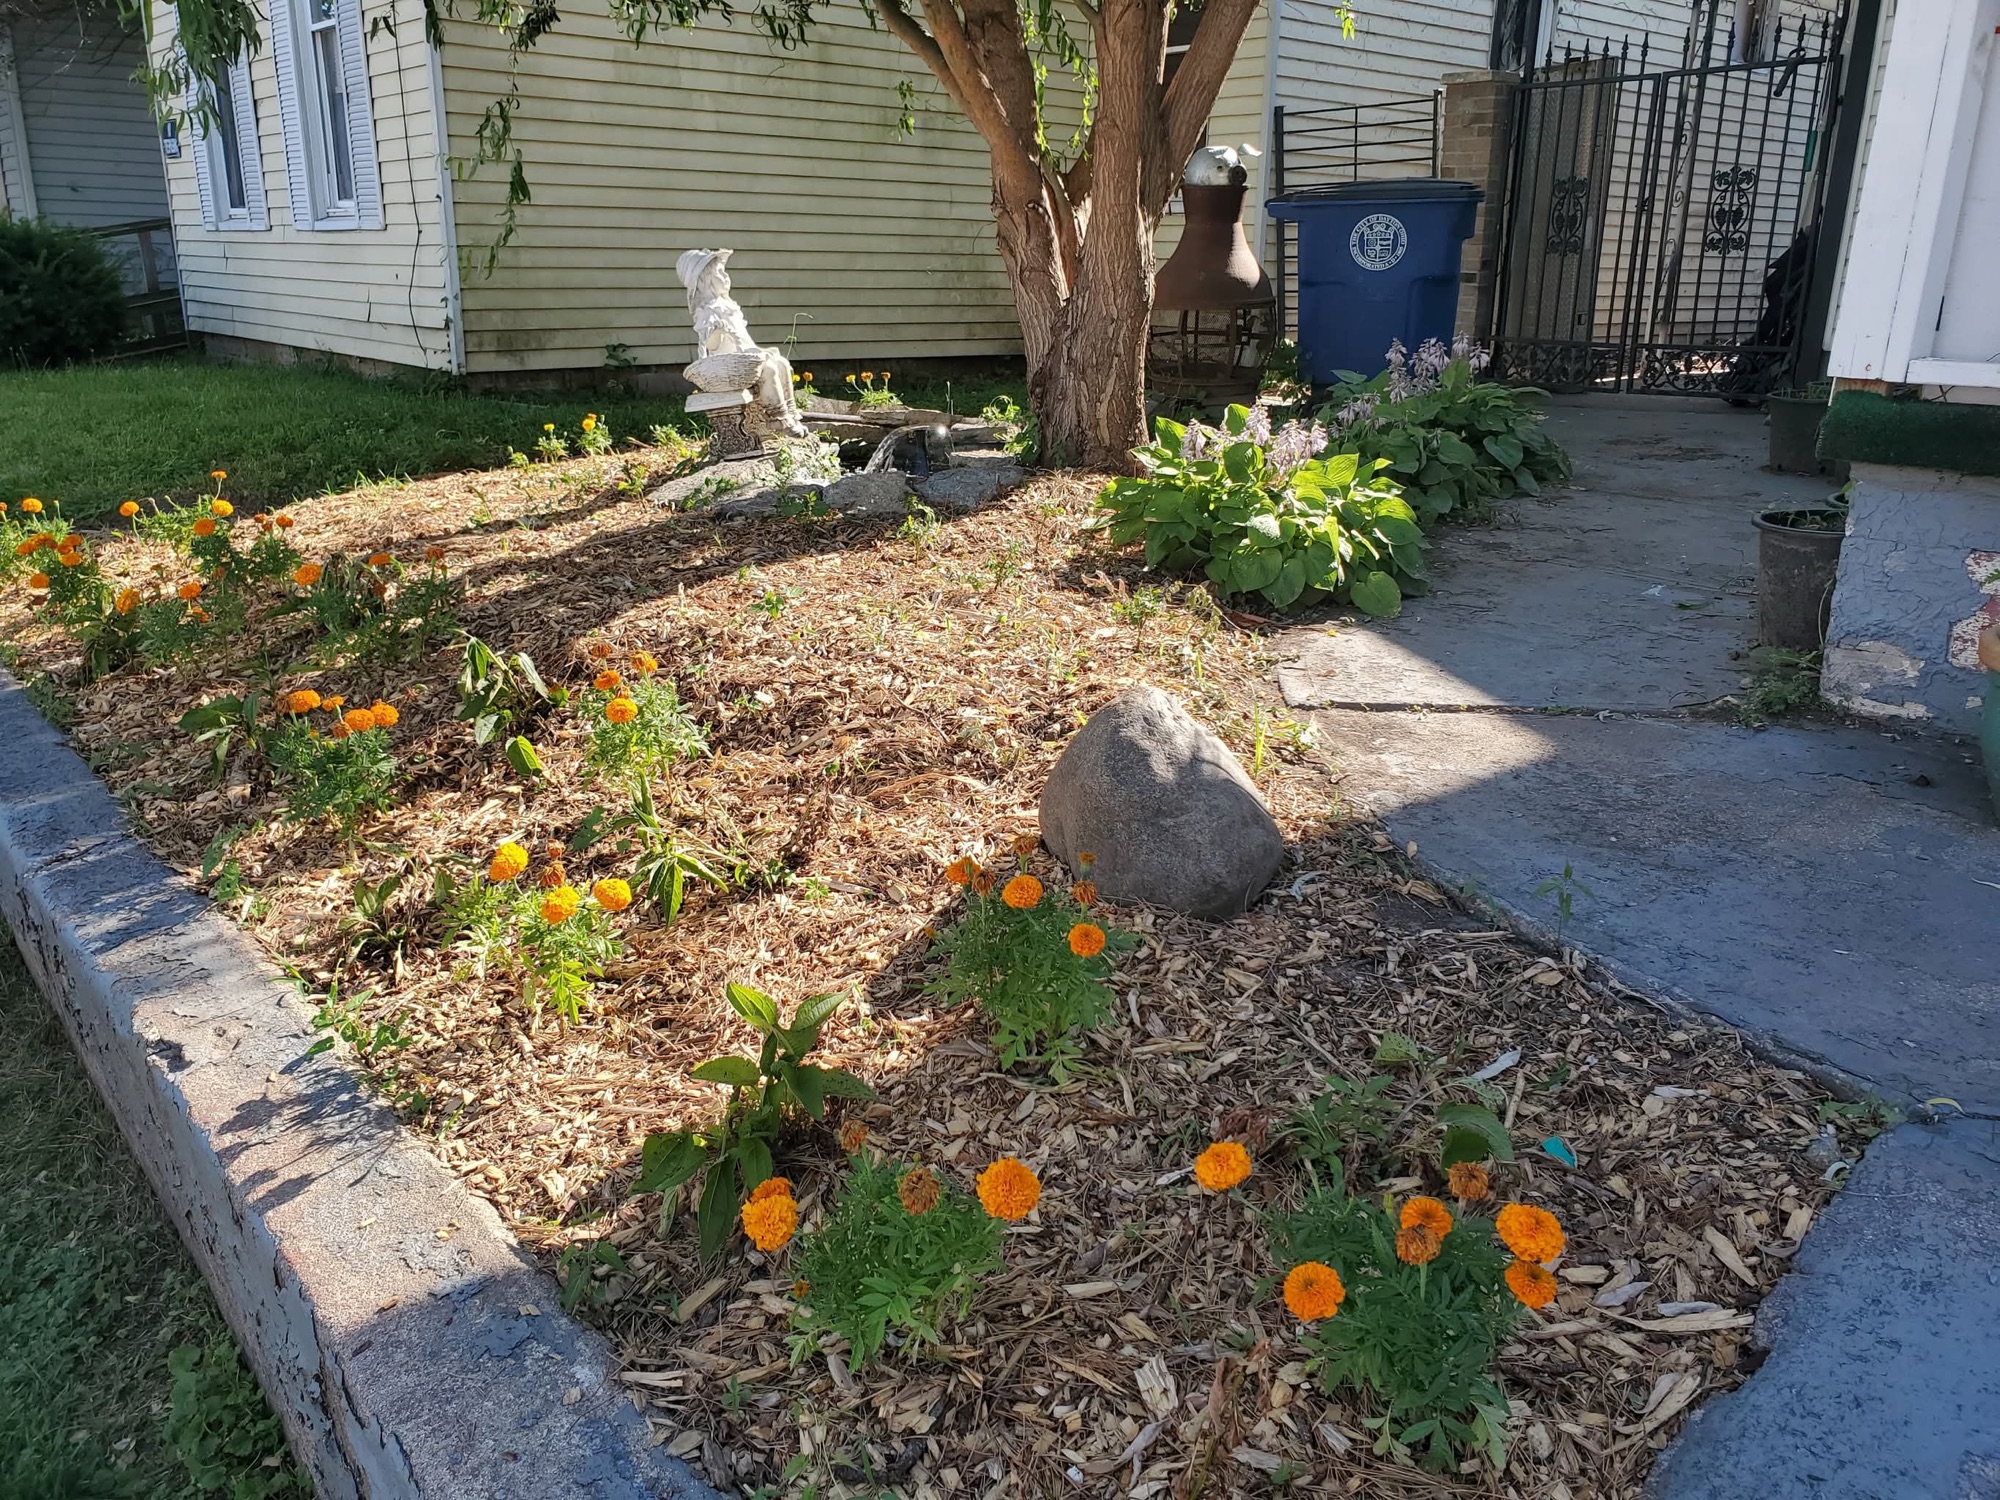
    On our farm, we didn’t transform our soil overnight.

    We started with heavy clay. Compacted. Lifeless.

    We didn’t fix it in a season.

    We:

    • Added compost (even when it wasn’t perfect)
    • Mulched with what we could get for free
    • Used what we had—cardboard, leaves, wood chips, shredded paper
    • Let time and biology do their work

    And slowly…

    That soil came alive. I look back at the days of digging out bricks, and rocks as we started the garden, and it is honestly hard to believe this soil was once so beige and…dead. I grab a handful of soil now and it is rich and nearly black.

    Not because we rushed it. Especially after our car accident, nothing is rushed. If anything, we slowed down even more and the changes became more gradual out of physical necessity.


    But because we stayed consistent. Because we consistently fed our soil exactly what it told us it needed.


    Slow Change Builds Confidence

    There’s something else that happens when you work this way.

    You start trusting yourself.

    Because you’re not guessing anymore—you’re learning.

    You see:

    • What works in your space
    • What doesn’t
    • What needs adjusting

    And that confidence?

    That’s what turns a beginner into someone who knows what they’re doing. I used to say I had a black thumb. My mother and grandparents were blessed with green thumbs. I realized later, I just wasn’t giving the plants what they needed. When I finally started to actually observe them, I realized the sky was the limit to what I can grow.


    Final Thoughts: Give It Time (and Give Yourself Grace)

    If you take nothing else from this, take this:

    You don’t need to do everything today.

    You just need to take the next step.

    Slow change isn’t about doing less—it’s about doing things in a way that actually lasts.

    So start where you are:

    • Add the compost
    • Plant the seed
    • Observe what happens

    And when something doesn’t go as planned?

    Good.

    That’s your opportunity to pivot, adjust, and build something even better.


    Regenerating earth, one backyard at a time… doesn’t happen overnight.
    But it does happen—beautifully—when you let it unfold the way nature intended.

    If you are wanting even more advice on building an abundant garden, check out my new book Growceries available HERE on amazon!

  • Carbon Drawdown and The Role of Urban Permaculture

    Carbon Drawdown and The Role of Urban Permaculture

    Heather holds a large Detroit Red Beet and a large leaf Kale while standing in her garden
    Heather holds a large Detroit Red Beet and a large leaf Kale while standing in her garden.

    Carbon drawdown refers to the process of removing carbon dioxide from the atmosphere and storing it in natural systems like soil, forests, and oceans. Carbon drawdown is critical for mitigating the impacts of climate change, and urban permaculture can play an important role in this process. Urban permaculture is a way of designing and managing urban spaces to mimic the natural systems found in healthy ecosystems. By using permaculture principles, we can create urban landscapes that are not only productive and beautiful but also contribute to carbon drawdown. Each thing we do has an impact on the environment around us. Here’s how urban permaculture can help with carbon drawdown:

    Soil Building

    Healthy soil is a key component of carbon drawdown, as it can store large amounts of carbon in the form of organic matter. Urban permaculture can help build healthy soil by using techniques like composting, cover cropping, and no-till gardening. Composting organic matter like food scraps, leaves, and grass clippings can help build healthy soil that stores carbon. Cover cropping involves planting crops like legumes or grasses that fix nitrogen and add organic matter to the soil. No-till gardening involves reducing or eliminating tilling, which can disrupt soil structure and release carbon. We mix all of these techniques in addition to heavy mulch adding even more carbon material back into the soil. By building healthy soil, urban permaculture can contribute carbon drawdown while also increasing soil fertility and plant productivity.

    Agroforestry

    Agroforestry is a land management system that combines trees and crops on the same piece of land. This system can contribute to carbon drawdown by sequestering carbon in trees and soil, reducing greenhouse gas emissions from agriculture, and increasing biodiversity. Urban permaculture can incorporate agroforestry techniques like planting fruit trees, using intercropping, and creating food forests. Each of our fruit and nut trees have companion plants around them in clusters called guilds. These guilds work together with the trees to increase yields and build the soil. Any combination of these techniques can help reduce the carbon footprint of urban food production while also providing food, shade, and habitat for wildlife.

    Carbon Farming

    Carbon farming involves using agricultural practices that increase carbon sequestration in soil and vegetation. Urban permaculture can incorporate carbon farming techniques like alley cropping, rotational grazing, and silvopasture. Alley cropping involves planting crops between rows of trees or shrubs, which helps reduce soil erosion, increases soil fertility, and sequesters carbon. Rotational grazing involves moving livestock between different grazing areas. This can help improve soil health and increase carbon storage in grasslands. While most urban areas have limited ability to include livestock, it is not completely out of the question.

    On our farm, we raise chickens that we free range during the day. This allows them to eat bugs that would otherwise harm the garden. But it also means they will scratch the ground allowing carbon deeper into the soil. Moving livestock also allows their manure to be deposited over a wider area, again encouraging healthy soil. Silvopasture involves integrating trees and livestock on the same land, which can provide multiple benefits like increased carbon storage, improved animal welfare, and higher crop yields. While silvopasturing may not be an option in all urban settings, it is certainly worth doing where possible.

    Urban Greening

    Urban greening refers to the process of adding vegetation to urban areas like parks, rooftops, and public spaces. We can contribute to carbon drawdown by using urban greening techniques like creating green roofs, installing vertical gardens, and planting trees. Green roofs and vertical gardens can help reduce the urban heat island effect, increase biodiversity, and sequester carbon. Planting trees in urban areas can help reduce air pollution, provide shade and cooling, provide food, and sequester carbon. The more areas in a city that can have living plants, the better.

    In conclusion, urban permaculture can play an important role in carbon drawdown by using any combination of the techniques in this article. By creating urban landscapes that mimic natural systems and contribute to carbon storage, we can mitigate the impacts of climate change while also creating productive and beautiful urban spaces. Urban permaculture offers a sustainable and regenerative approach to urban design that benefits both people and the planet. Remember, permaculture is not a sprint, but a marathon. We’ve been building our urban farm for 3 years, and continue to improve every week. Each step a family can take to move towards a greener life helps the planet breathe a little easier.

  • How to Calculate the Number of Plants Needed to Feed Your Family

    How to Calculate the Number of Plants Needed to Feed Your Family

    Growing your own food is a rewarding and sustainable way to provide healthy and fresh produce for your family. However, before you start planting your garden, it’s important to determine how many plants are needed to feed your family. Not planting enough produce means you’ll need to source food from somewhere else, planting too much creates waste. If you’re looking for a graph that tells you exactly how much you’ll need, unfortunately that isn’t something that I can accurately create. I say this because each family has different tastes, and each person has different dietary needs. While I can’t give you an exact count, here are some steps to help you determine your own planting needs.

    Determine Your Family’s Food Needs

    The first step in determining how much to plant is to figure out how much food your family needs. This can vary depending on the number of people in your family, their ages, activity levels, and dietary requirements. This can also vary greatly if you are planning to grow food for livestock. We always plant more than we think we’ll need. We know that we can feed our surplus to our chickens and rabbits. A good place to start is to use a food calculator, such as the USDA’s MyPlate Plan. This tool can help you determine how many calories and nutrients your family needs each day.

    Another great option is to keep a running list of ingredients that you add to each time you cook. Keep that information handy and use it to plan the following year’s garden.

    Plan Your Garden Space

    Once you know your family’s food needs, you can plan your garden space accordingly. Consider the available space you have and the types of plants that grow well in your climate and soil conditions. It’s also important to consider how much time and effort you’re willing to invest in maintaining your garden. This is another time when your garden planner and journal will be really important. For example, you may need 25 plants to accommodate your family’s needs, but only have space for half of that. In this case, you can look into varieties that offer higher yields. Adding container gardening to your plan or planting in a community garden are more options.

    Just remember that while you may not be able to grow 100% of your own food, anything that you are able to grow is a step in the right direction.

    Choose Your Crops

    Choose the crops you want to grow based on your family’s preferences and nutritional needs. You may want to focus on vegetables that are expensive to buy, such as tomatoes, peppers, and cucumbers. Gardeners may also choose produce that their family enjoys eating regularly. .

    In our family, we grow a ton of tomatoes, cucumbers, leafy greens, potatoes, and herbs. We grow plenty of other edible plants as well. Since these are the plants that our family tends to eat more than others, we always make sure to plant plenty of them. This year we are planting extra green beans because we learned that we absolutely love dill pickled green beans!

    Calculate How Much to Plant

    To calculate how much to plant, you’ll need to consider the yield of each crop and the number of plants you’ll need to meet your family’s needs. For example, one tomato plant can yield up to 10 pounds of tomatoes. A single zucchini plant can produce up to 10 zucchinis per season! That’s a lot of zucchini. You can use online calculators or reference books to determine the expected yield for each crop.

    You’ll also want to factor in the ability to preserve anything that you can’t use while it is fresh. For example, lettuce is not a crop that stores well, so for families that do not raise livestock, growing more lettuce than you can consume before it bolts or spoils will only serve as compost. If you are growing things for livestock, be sure to calculate how much you will need to grow to feed your livestock.

    Plan for Succession Planting

    Succession planting is the practice of planting crops at different times throughout the growing season. This is done to ensure a steady supply of fresh produce. By staggering your planting times, you can ensure that you have a continuous supply of fresh vegetables throughout the season. You can also consider planting a variety of crops that mature at different times. Fast-maturing crops like lettuce and radishes, can be paired with slower-growing crops like tomatoes and peppers.

    We stagger our radish planting by about 2 weeks and plant them every 2 weeks from late March until early November here at Hogs and Hens Urban Farm. We’re in zone 6a, so be sure to plan for your crops to be harvested before your first frost when planting frost intolerant plants like tomatoes and peppers.

    Consider Preservation Methods

    Once you’ve determined how much to plant, you’ll need to consider how to preserve your harvest for future use. Consider canning, freezing, or drying your excess produce to ensure you have a supply of fresh vegetables throughout the year. Other great option for preserving fresh produce is using a freeze dryer. We currently do not have this equipment on our farm, but are hoping to add it to our preservation tools in the future. Creating things like Nasturtium Pesto is a great way to use and store surplus herbs.

    In conclusion, determining how much to plant to feed your family requires careful planning and consideration. By using the steps listed above, you can ensure that you have a steady supply of fresh and healthy produce to feed your family. Gardening can be a rewarding and sustainable way to provide for your family, and with some planning and effort, you can enjoy the fruits of your labor all year round.

  • Urban Farm Composting Made Simple

    Urban Farm Composting Made Simple

    Composting is the process of breaking down organic materials like food scraps, yard waste, and other organic matter into a rich soil amendment that can be used to improve the health of your garden. Composting is an easy and eco-friendly way to reduce waste and improve the health of your plants. There are several different types of garden composting methods that you can use depending on your space, time, and resources. You can listen to Heather talk about composting in Season 1 Episode 14.

    Here are a few of our favorite types of garden composting and how you can get started with them today.

    Traditional Composting

    Traditional composting is the most common and well-known method of composting. It involves creating a pile of organic matter in a designated area and allowing it to decompose over time. Traditional composting requires a mix of “greens” (nitrogen-rich materials like grass clippings and vegetable scraps) and “browns” (carbon-rich materials like leaves and paper) to create the ideal balance for decomposition. The pile should be turned regularly to aerate it and allow the organic matter to decompose evenly. Traditional composting can take several months to a year to produce usable compost, but it’s a great way to create a large amount of compost at once. We use a large 2 bin system that is made entirely from reclaimed wood. This method works great if you have space for the pile.

    Vermicomposting

    Vermicomposting involves using worms to break down organic matter into compost. Worms consume the organic matter and excrete castings, which are rich in nutrients and beneficial microorganisms. Vermicomposting can be done indoors or outdoors, and is ideal for small spaces like apartments or balconies. To start vermicomposting, you’ll need a bin, bedding materials like shredded newspaper or cardboard, and worms. The worms can be purchased online or at a local garden center. We use red wiggler worms in our vermicomposting setup because they are the most efficient at breaking down material. Vermicomposting produces compost faster than traditional composting, typically within 2-3 months. This method works great for small spaces, and is less labor intensive than traditional composting.

    Sheet Composting

    Sheet composting, also known as lasagna gardening, involves layering organic materials directly on top of your garden bed. The layers can include things like leaves, grass clippings, kitchen scraps, and other organic matter. The layers should be watered to encourage decomposition, and over time the organic matter will break down and create compost. We use this method as well here at Hogs and Hens Urban Farm. We have had great results from layering the material and allowing nature to take its course. Sheet composting is a great way to build soil fertility and structure over time, and it can be done year-round. It’s also a great way to convert an unused or weedy garden bed into a productive growing space.

    Trench Composting

    Trench composting involves digging a trench in your garden bed and filling it with organic matter. The organic matter is then covered with soil and left to decompose. As the organic matter decomposes, it will enrich the soil and improve the health of your plants. Trench composting is a great way to add organic matter to your garden bed without having to move a large amount of compost around. It’s also a great way to add nutrients directly to the root zone of your plants. We employ this method in our hügelkultur beds but because this method requires digging, it is more labor intensive. This method is best if you have a large area to dig your trenches.

    In conclusion, there are several different types of garden composting methods that you can use to create rich, nutrient-dense compost for your garden. We covered just a few of them today, and will cover more options in future articles. Whether you choose traditional composting, vermicomposting, sheet composting, or trench composting, the key is to create a balance of greens and browns, turn or mix the pile regularly, and keep it moist to encourage decomposition. With a little patience and effort, you can create a thriving compost pile that will help you grow healthy, vibrant plants in your garden. If you’re looking to get started in Urban Permaculture, check out this article Starting Urban Permaculture: How to Create a Sustainable Garden in the City for a simple guide to getting started!

  • Starting Urban Permaculture: How to Create a Sustainable Garden in the City

    Starting Urban Permaculture: How to Create a Sustainable Garden in the City

    Permaculture is a sustainable and holistic approach to gardening that aims to create a self-sustaining ecosystem that produces food and other resources. While permaculture is often associated with rural areas, it’s also possible to create a permaculture garden in an urban environment. In fact, urban permaculture is becoming increasingly popular as more people seek to grow their own food and reduce their environmental impact. Here are some tips for starting your own urban permaculture garden. We started small with one little planter box, and now we have a huge garden! Read on to learn more ways you can get started today!

    Assess Your Space

    The first step in starting an urban permaculture garden is to assess your space. Consider the amount of sunlight your space receives, the type of soil you have, and the size of your space. Even small spaces like balconies and rooftops can be used to create a permaculture garden. Think creatively about how you can make the most of your space, whether that means using vertical space, creating raised beds, or using containers.

    Choose Your Plants

    When choosing plants for your urban permaculture garden, look for plants that are well-suited to your climate and soil type. Consider planting a mix of annual and perennial plants, including fruit trees, shrubs, and vegetables. In permaculture, diversity is key, so aim to plant a mix of plants that support each other and create a self-sustaining ecosystem.

    Incorporate Companion Planting

    Companion planting is a technique that involves planting different plants together that have mutually beneficial relationships. For example, planting marigolds with tomatoes can help repel pests, while planting beans with corn can help fix nitrogen in the soil. Incorporating companion planting into your permaculture garden can help create a healthier and more sustainable ecosystem.

    Build Healthy Soil

    Healthy soil is the foundation of any successful permaculture garden. In urban areas, the soil is often depleted or contaminated, so it’s important to build healthy soil by adding organic matter, compost, and other soil amendments. You can also consider using raised beds or container gardens filled with healthy soil to ensure that your plants have the nutrients they need to thrive. Here at Hogs and Hens Urban farm, we use a mixture of raised beds, and planting directly in the ground. In both cases, we are very careful to build strong and healthy soil.

    Use Sustainable Practices

    Permaculture is all about sustainability, so it’s important to use sustainable practices in your garden. This includes using organic fertilizers and pesticides, conserving water, and reducing waste. You can also incorporate sustainable practices like rainwater harvesting, composting, and using recycled materials in your garden. We make it a point to reduce, reuse, and recycle as much as possible. Many of the projects here at Hogs and Hens are created using reclaimed materials. Get creative with ways to reduce your single use item purchases!

    Continuously Learn and Adapt

    Permaculture is a lifelong learning process, so be prepared to continuously learn and adapt as you create your garden. Join a local permaculture group, attend workshops and conferences, and read books and blogs to learn more about permaculture and how to apply it in an urban environment. Don’t be afraid to experiment and try new things, and be open to adapting your garden as needed. Be sure to find us on Facebook and ask any questions you may have along the way. We’ve found that learning by networking has been a game changer for our farm!

    In conclusion, starting an urban permaculture garden is a great way to create a sustainable and self-sustaining ecosystem in the city. By assessing your space, choosing the right plants, incorporating companion planting, building healthy soil, using sustainable practices, and continuously learning and adapting, you can create a beautiful and productive permaculture garden that supports both you and the environment.

  • 13 Reasons Why You Should Grow Nasturtium

    13 Reasons Why You Should Grow Nasturtium

    Here at Hogs and Hens Urban Farm, one of our absolute favorite plants to grow is nasturtium. This beautiful and colorful plant is an incredible addition to any garden, and here are 13 reasons why you should be sure to include it in your garden plans this year! You can order nasturtium seeds right now from Amazon!

    1- The flowers from this plant are absolutely stunning and are very easy to press and dry for use in a variety of craft and decorating projects.

    2- The flowers of the nasturtium plant have a very pleasant scent both in the garden and in a vase of fresh cut flowers.

    3- This plant is fantastic to feed to your poultry! Chickens especially love the taste of the entire nasturtium plant! Best of all, nasturtiums are a fantastic way to naturally deworm your chickens!

    4- Nasturtiums make an incredible garnish for any meal. Not only are the plants visually appealing to your dish, but they are totally edible from the roots to the seeds!

    5- Nasturtiums are delicious! They have a mildly spicy flavor and a soft texture. We love adding them to salads, soups, stews, and stir fried meals. Try our delicious recipe for Nasturtium Pesto!

    Nasturtium Pesto

    INGREDIENTS 

    • 1 large colander of fresh nasturtium leaves and flowers
    • ¼ cup pistachios or cashews
    • ½ cup olive oil (avocado oil works well too!)
    • ½ cup fresh Parmesan cheese
    • ½ tsp dried red pepper flakes (optional)
    • salt and pepper to taste

    INSTRUCTIONS

    • Wash the nasturtium leaves and flowers and lightly pat them dry. Toast the nuts – put them in a dry pan over medium heat, stirring every 30 seconds or so. Cook for 2-3 minutes – until they start to smell good. Then take them off the heat. Caution- when toasting the nuts, pay close attention and stir often as they will scorch very fast!
    • Fill your food processor or blender ¾ with nasturtium leaves. Blend until they are well chopped. Add more leaves and continue this until all of the leaves are blended well.
    • Add in the toasted nuts and blend until finely chopped.
    • Add in the cheese, red pepper flakes and half the oil. Blend.
    • Add additional oil until you get your desired consistency.  This will vary depending on your texture preferences
    • Taste. Add salt, black pepper, more nuts or more cheese to match your tastes.
    • OPTIONAL – If you like traditional pesto, add a little fresh basil in your leaf mix to add a bit of traditional flavor to your pesto.

    6- If you struggle with drought in your area, fear not! Nasturtium are incredibly drought resistant and do not require much water at all to thrive. No need to worry about expanding your irrigation system to the nasturtium patch, just let nature be your watering guide!

    7- If you are looking for a plant that flowers for the majority of the season, look no further than the humble nasturtium! These plants grow very quickly from seeds and will bloom from early spring until late into the fall.

    8- Soil thrives when it is covered, and nasturtium works great as a living cover crop and natural mulch.

    9- Because it grows in nearly any soil conditions and requires little water or care, nasturtium works fantastic as a weed barrier. When planting this crop densely in a garden or flower bed, it will absorb the liquid and nutrition that is available which pulls resources away from potential weeds. As the plants grow, they will shade the soil below helping to prevent weed seeds from germinating.

    10- Nasturtium are high in beneficial minerals such as potassium, phosphorus, calcium and magnesium, as well as macro elements, including zinc, copper and iron.

    11- If you are looking for a plant to attract beneficial insects, nasturtium is the right plant for the job. Nasturtium is fantastic for attracting aphids and other garden pests. When planting it in a garden, be sure to plant it away from brassicas and other edible plants, as it WILL attract pests. This is a great way to distract the pests from your veggies and sacrifice the nasturtiums in their place. Check out The Urban Permaculture Podcast to learn about adding this plant to your integrated pest management system!

    12- Nasturtiums will self seed! While they are an annual flowering plant, nasturtium will drop seeds if you don’t collect them to eat first. This means that when soil conditions become right to germinate, the seeds will begin to sprout all on their own, making them a very easy crop to sow that will come back for many seasons if allowed to drop their seeds.

    13- But best of all… every part of the nasturtium is edible! That’s right, not only are the leaves delicious in things like pesto, and salads, but the flowers are entirely edible and look stunning mixed into a salad, and the seeds are slightly sweet and peppery and can be ground in a pepper grinder to add a complex flavor to your favorite dish!

    After learning all of the ways nasturtium can be beneficial to you and your garden, what is holding you back from planting these incredible plants today?!

  • 10 Essential Tools Every Gardener Needs

    10 Essential Tools Every Gardener Needs

    Ga

    When it comes to gardening, having the right tools can make all the difference. But if you’re fairly new to the concept, it can be difficult to know which ones are an absolute necessity. And to make matters worse, things can get even more complicated during a visit to your local lawn and garden store. That’s because you’ll find all kinds of different gardening tools, and there’s also the chance that you don’t even know what half of them are used for. Not to worry! To keep you from going overboard on unnecessary gardening tools purchases or the mistake of not getting everything that you need, it’s essential to know what tools a gardener can’t live without.

    These are 10 essential tools that every gardener needs to have in order to tackle any gardening project. 

    1. Gloves– Don’t try to be that tough guy or gal that forgoes using gardening gloves because at some point you’re going to regret it. Gloves are designed to protect your hands from blisters, cuts, scratches, and splinters, which can all be very painful. Get yourself a durable pair that can handle tough tasks such as digging, pruning, moving material, and other demanding jobs.

    2.Spade or Shovel– You take your pick on whether you’ll go with a spade or a shovel because you’re going to need one or the other. But if it were up to me, I’d personally go with the spade. That’s because it’s able to give you clean and straight edges and it’s also great for cutting up roots, planting, and transplanting. 

    3.Hand Trowel– At certain points throughout the season, you’ll need a hand trowel for planting and transplanting flowers and plants in your garden beds. They also can be used to help get rid of weeds. A hand trowel that has a broad blade is useful for moving more soil while a trowel with a narrow blade is better to use on rocky soil and digging up weeds. While you’ll pay more for the stainless steelhead, it will last much longer than every other hand trowel out there. 

    4. Loppers– When you’re needing to cut down large limbs and thicker branches, loppers are a cutting tool that will certainly come in handy for you. You’ll discover that there are anvil and bypass types that range Get yourself loppers with longer handles, which will provide you with more leverage to cut through thicker limbs. But that also means that they’ll be heavier too. 

    5. Garden Hoe– The garden hoe is an extremely effective and versatile tool that can tackle several of the toughest jobs in your garden, including cutting up roots, digging a trench, moving soil, weeding, and much more. So no matter if you’re digging, planting, chopping, or cultivating your garden, the garden hoe is one of the closest friends to a gardener. 

    6. Pruning Shears– Pruning shears are another essential gardening tool that you will need to help you prune fruit trees, vegetables, roses, and shrubs. Be sure that you go with a pair of high quality, that way your blade stays sharp longer. Also make sure that you choose shears that fit in your hands comfortably, because pruning can become repetitive and may start to hurt if you have a crummy pair. 

    7. Hedge Shears– Do you have a lot of landscaping to maintain around your lawn and garden? Or maybe several hard-to-reach areas that need to be touched up from time to time? If so, you’re going to want more than just pruning shears to handle the job. Hedge trimmers and shears will leave your landscaping looking absolutely perfect while also keeping your plants healthy. You can choose between gas, electric, or a pair that requires a bit of labor from you. 

    8. Watering Hose Your garden plants require a lot of watering and you certainly can’t rely on the rain all the time. And to be honest, a watering can isn’t the most practical tool to use when you have a large garden, so a watering hose is the best way to go. You’ll also want to consider getting a good hose nozzle or watering wand so that you can customize the amount of water that’s coming out of the hose.

    9. Weeder– Ugh, weeds! A gardener’s worst nightmare! And no matter how much you do to prevent them, they’re still sure to sneak up on you at some point. This is why you need to get yourself a good weeding tool to help you combat them. We love using the Cobra Head weeding tool on our farm! 

    10. Wheelbarrow– A wheelbarrow is a fabulous tool that allows you to accomplish much bigger tasks and in fewer trips. They can be used for moving plants, dirt, mulch, gravel, stones, tools, yard waste, and so much more. But before you transport something heavy, make sure that the weight is distributed evenly, that way you don’t end up tipping your load. 

    These were 10 essential tools that every gardener needs in order to have great success in their garden. What’s nice about several of them is that they are able to perform more than one task in your garden. Can you think of any other gardening tools that may be necessary? Or if you’re an experienced gardener, what’s the go-to gardening tool that you couldn’t survive without?

    You can listen to what Heather says about tools on a budget in Season 1 Episode 10 of the Urban Permaculture Podcast.